.png)
A Journey Towards Healthy Soil
- Feb 25, 2025
- 4 min read
Updated: Aug 25, 2025

In the heart of a suburban neighborhood, amidst rows of meticulously kept gardens, Alex's plot stood out—not for its sprawling size or exotic flora, but for its vibrancy and life. A year ago, Alex embarked on a gardening journey, motivated by a desire to cultivate food and flowers in harmony with nature. The quest led to the discovery of our Regenerative Gardening Kit, a turning point in Alex's gardening practice.
The Discovery
Like many home gardeners, Alex started with enthusiasm but limited knowledge. The initial reliance on store-bought compost and fertilizers yielded modest results but felt at odds with a deeper environmental ethos. The discovery of our kit came as a revelation. Designed as a comprehensive solution for sustainable gardening, it offered an alternative—and in many ways, an enhancement—to traditional composting and synthetic fertilizers.
An Alternative to Compost
Our kit serves as an excellent stand-alone soil amendment or a complement to compost. While compost adds valuable organic matter to the soil, it requires time, space, and effort to produce. Our kit, enriched with a blend of essential microorganisms and organic matter, provides an immediate boost to soil health, mirroring the benefits of high-quality compost without the wait. For Alex, integrating the kit into the gardening routine meant enjoying the perks of enriched soil right from the start of the season.
Seed Starting Success
As the gardening season approached, Alex discovered yet another application of our Regenerative Gardening Kit that would set a new standard for starting seeds. At the heart of this process was Earth's Embrace, a rich soil amendment that, when inoculated into water, transforms into a potent, liquid bio booster. This innovation presented a straightforward yet revolutionary way to supercharge seed starting with the essence of high-quality compost.
a step-by-step guide to seed starting
1. Choose Your Seeds
Select high-quality seeds of the plants you want to grow. Consider your climate, the growing season length, and your garden space when choosing varieties.
2. Gather Supplies
Seed starting mix: A light, sterile mix that's ideal for seed germination.
Containers: Seed trays, pots, or any containers with drainage holes. Reusable and biodegradable options are available.
Labels: To keep track of what you've planted.
Watering can or spray bottle: For gentle watering that won't disturb the seeds.
Heat mat (optional): Helps with germination for seeds that require warmth.
3. Prepare the Seed Starting Mix
Moisten the seed starting mix with water until it’s damp but not soggy. Fill your containers with the mix, leaving a little space at the top.
4. Plant the Seeds
Refer to the seed packet for specific planting depths and spacing. Generally, seeds should be planted at a depth of about two times their diameter. Some tiny seeds are sprinkled on top of the soil and lightly pressed in, not covered.
5. Water Gently
Water the seeds gently using a spray bottle or a watering can with a fine sprinkle. The goal is to moisten the soil without displacing the seeds.
6. Cover the Containers
Covering the containers with plastic wrap or a plastic dome helps retain moisture and warmth, creating a mini greenhouse effect.
7. Place in a Warm Location
Place your containers in a warm spot to encourage germination. A heat mat can be used for extra warmth, especially for seeds that require higher temperatures to germinate.
8. Monitor and Maintain
Check the containers daily for moisture and water as needed to keep the soil consistently moist. Watch for mold growth; if you see any, remove the cover for a few hours a day to increase air circulation.
9. Provide Light
Once seeds sprout, remove the cover and move the containers to a brightly lit location. A south-facing window or grow lights are ideal to prevent seedlings from becoming leggy.
10. Thin Seedlings
If more than one seedling sprouts in the same spot, thin them out by snipping the weakest seedlings at soil level with scissors. This ensures the strongest, healthiest plants have room to grow.
11. Transplant When Ready
When seedlings develop their second set of true leaves, they’re ready to be transplanted into larger containers or moved to their final growing location, whether that's outdoor beds or larger pots.
12. Harden Off Seedlings
Before transplanting outdoors, acclimate seedlings to outdoor conditions by gradually exposing them to outside temperatures and sunlight over a week. This process is known as "hardening off."
Starting seeds is a process that requires patience, attention, and care. Each step, from choosing the right seeds to hardening off the seedlings, is crucial in developing strong plants that will thrive in your garden.
Transplants and Beyond
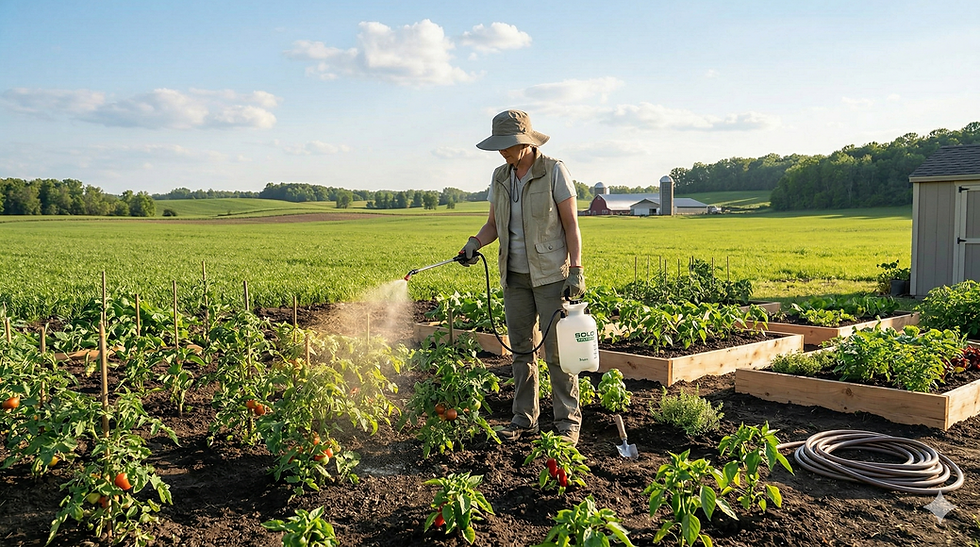
As the season progressed, Alex found the kit equally beneficial for transplanting. The enriched soil minimized transplant shock, allowing young plants to thrive from the moment they were settled into their new home. The ease of application, suitable for any hose-end or pump sprayer, meant that the entire garden could be treated efficiently, ensuring uniform soil quality.
Lawn Applications
The kit's versatility extended to lawn care, where it revitalized the grass, enhancing its color and density. The lawn became a lush, inviting carpet, resilient against foot traffic and less susceptible to pests and diseases. The contrast with untreated areas was stark, underscoring the kit's effectiveness.
Saving Money and Fostering Sustainability
Beyond the immediate benefits to plants and soil, Alex discovered financial and environmental advantages. The need for water and chemical fertilizers diminished, reducing the garden's environmental impact and lowering monthly expenses. By phasing out synthetic fertilizers, Alex not only saved money but also contributed to building a more sustainable ecosystem in the backyard.
A Thriving Environment
The kit encouraged a balanced garden ecosystem. Beneficial insects returned in greater numbers, soil health visibly improved, and plants were more resilient. This harmony translated into bountiful harvests of fruits and vegetables, vibrant blooms, and a verdant lawn—all achieved with minimal intervention and maximum respect for nature.
A Sustainable Future
Alex's journey with the kit reflects a broader shift towards sustainable gardening practices. By choosing our Regenerative Gardening Kit, gardeners can transform their spaces into thriving, eco-friendly environments. It's a choice that benefits not only the individual garden but also the planet.
The story of Alex's garden is a testament to the potential that lies in every seed and soil. With the right approach, we can cultivate not just plants, but a future where gardens are a source of life, beauty, and ecological balance. Our Regenerative Gardening Kit is more than a product; it's a pathway to this future, available to any gardener ready to take the first step.


Comments